How to build a mining rig in 2021? - part 2
In this guide, we are going to continue where we left off in part 1.
Once you have successfully bought all the components, the next step is to assemble the rig. It might look complicated, but don’t be afraid. If you can build a LEGO set or have ever assembled a PC, you can also build a mining rig!
If you are stuck on any of the steps below, you are welcome to join the smartest mining community on our Reddit or Discord server, where our company representative or other users will help you out.
Building the mining rig
Step 1 - Motherboard
Start with the motherboard outside of the mining frame. Please put it on the package box with an anti-static bag or foam beneath it and release the lever holding down the CPU socket protection plastic.
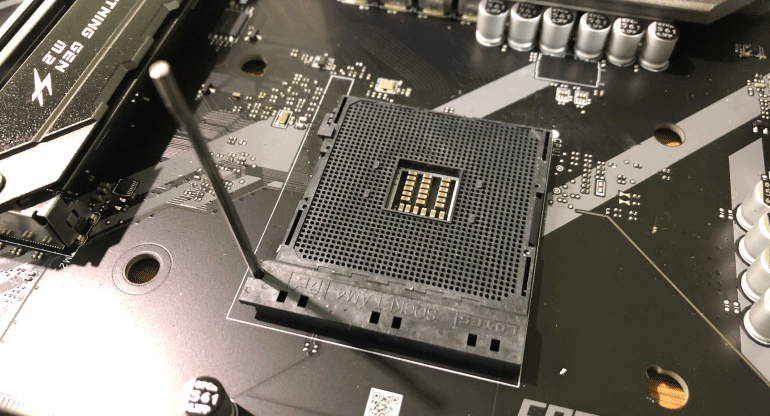
Step 2 - Processor
Open your processor box and insert the CPU in the motherboard socket. Notice the small triangle at one corner of the CPU and the motherboard socket. These two need to be on the same side, or the CPU will not fit into the socket.
IMPORTANT: Be very careful. Bending the CPU pins will damage the CPU! 
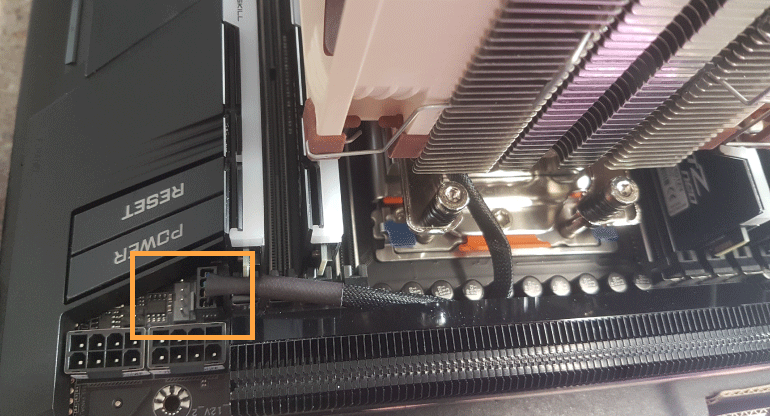
Next, follow the manufacturer's manual and place the CPU heatsink on the top of the processor. Thermal paste should already be applied to the heatsink. Do not forget to connect the heatsink’s power cable to the CPU_FAN1 pins on the motherboard (pictured below). Check the manufacturer manual to locate CPU_FAN1 pins on your motherboard.
Step 3 - RAM
Next, we have to install the system memory or RAM. Insert the RAM module into the motherboard RAM socket.
Open the side brackets of the slot and carefully push the RAM module into the slot. Be careful as RAM can only fit the slot oriented one way! A bit harder push is needed sometimes for the RAM to fit in the slot. Side brackets will close automatically when the RAM fits in the slot correctly (pictured below).

Step 4 - Fixing the motherboard to the frame
Carefully place the motherboard to the mining frame (or whatever you are using for a frame). Be careful not to scratch the bottom of the motherboard. If you have a metal case, make sure that the motherboard is only touching the frame where the holes for screws are located. Fix the motherboard with screws.
Step 5 - Connecting the PSU to the motherboard
Unbox your PSU and place it somewhere close to the motherboard. If you are using a mining frame, the frame should have a place where you can install the PSU.
Find the 24-pin power connector and plug it into the motherboard. Motherboards normally have only one 24-pin connector. Be careful to connect the 24-pin connector firmly; otherwise, the rig might not boot.
Next, find the CPU 8-pin power connector and connect it to the motherboard. This connector should be located close to the processor as it is used to power the processor.
IMPORTANT: Be careful not to mix up PCI-e 6+2 power connector with a CPU power connector. They can both be 8 pin connectors. Normally CPU power cable is a bit thicker and is only one, whereas PCI-e power connectors have 2x 6+2 connectors, one a single cable.
![]()
Step 6 - Connecting USB risers to motherboard and PSU
Assemble PCI-e x1 to x16 USB risers together and plug the PCI-e x1 (the short PCI-e connector) into the motherboard.
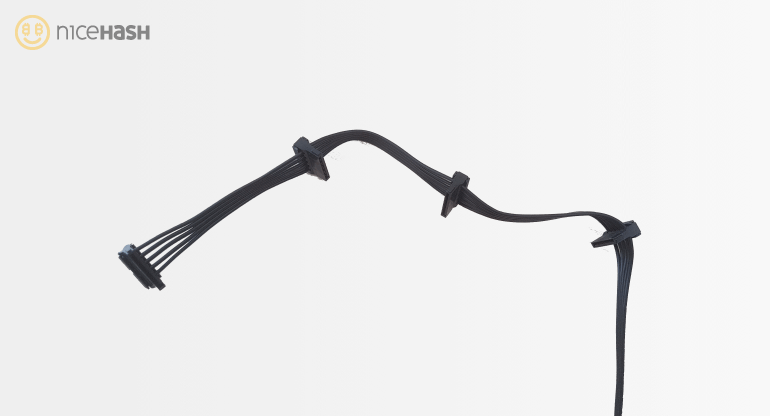
Now you need to power the risers. Depending on your riser model, you might need a SATA, Molex or PCI-e 6 pin connector to power it. Connect the corresponding power cables to each USB riser.
IMPORTANT: Use only 2 or fewer SATA or Molex connectors per PSU cable. Using all 3 or even 4 connectors to power 3 or 4 USB risers will most likely damage the connector and might even cause a fire!
Step 7 - Installing the GPUs
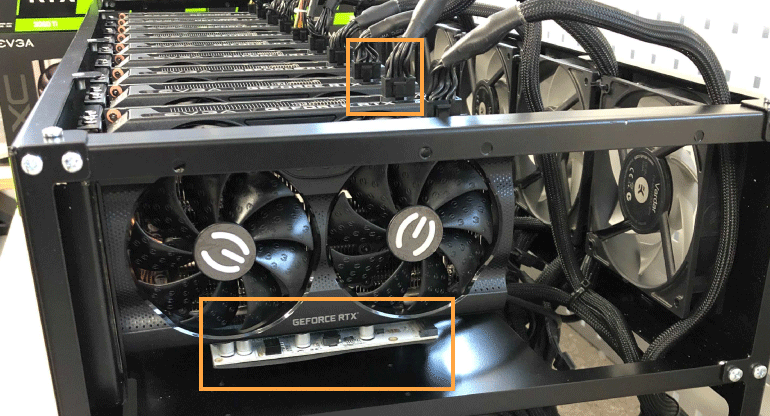
You are almost there! Plug the graphics card into the USB riser and place it on the frame. Make sure you fix it firmly so it does not fall down. Do this for all of your GPUs.
Next, plug the PCI-e 6+2 power connectors from the PSU into your GPU. Repeat this process with all graphics cards. Be careful to connect the PCI-e power connector firmly (pictured below).
Step 8 - Final step
It has come down to the final step. Before turning the rig on, go through all the above steps again, and triple check if you did everything correctly. Make sure all the cables are firmly connected, nothing is loose. Connect the monitor to the graphics card that is connected to the main PCI-E slot.
Connect the mouse and keyboard.
To turn the rig on, you either have to connect the power switch to the power pins on the motherboard or short the power on pins with a screwdriver or other metal object. You can find the location of these pins in the motherboard manual.
Turn the rig on and see if it boots. If you get a BIOS message on the screen you have assembled everything correctly!
That is it! See you in the next and final part, where we will install Windows and NiceHash Miner and optimize the rig for optimal mining performance.